Updating DataCove’s Network Configuration
Planning and Prerequisites
At some point in a DataCove’s life, the network information on the system will likely need to be updated to reflect a new IP address assignment, DNS change or even an entire subnet or gateway alteration. In these scenarios, network changes are made at the DataCove console. Connectivity to the console can be handled in multiple ways, whether that is directly connecting a keyboard and monitor to a physical DataCove, attaching a virtual console to a virtual machine or most commonly, connecting over the network via Secure Shell (SSH) over TCP Port 22 for remote terminal access.
This article will discuss the use of the popular and free Putty remote access application, used for many remote administration tasks and supporting multiple protocols, including SSH.
If this software is not available, similar SSH-capable software like SecureCRT can also achieve the same goals and is safe to use if that is a familiar application. Otherwise, please proceed with the below guidance to download the Putty application.
Begin by opening a web browser of any type and navigating to Www.Putty.Org, the official website of the tool.
Select the Download Putty link at the top of the screen.
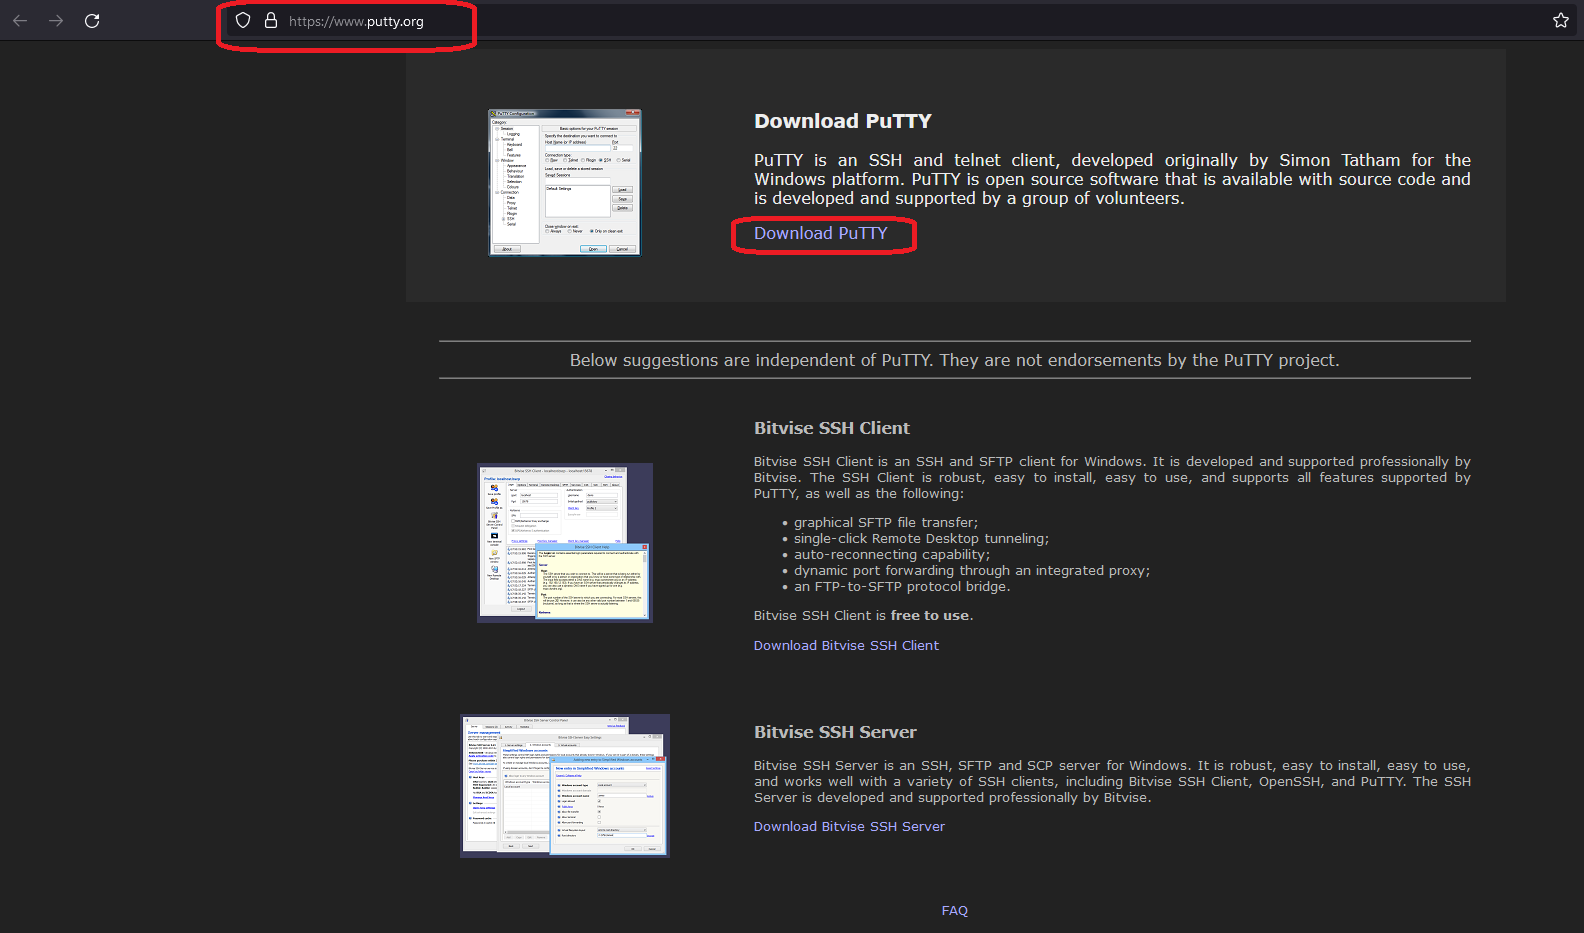
This will launch a link to the official releases page, hosted at Chiark.Greenend.Org.UK.
Locate the Windows Installer MSI and download a 64-bit version.
Once downloaded, run the installer sequence; this is largely a “Next-Next-Finish” affair without any frills.

Once the installation is complete, type “Putty” into the Windows search bar or locate Putty under the installed Programs list and launch the application.
Logging into DataCove via SSH for Terminal Access
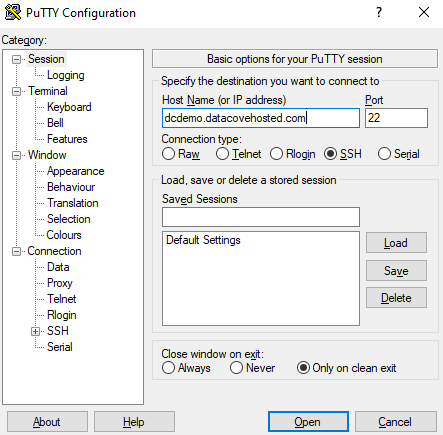
When Putty launches, a window will appear asking for a few parameters to be assigned.
Type in the DataCove’s Fully Qualified Domain Name (FQDN) or IP address and assign the connection type to SSH.
The Port used will automatically change to 22.
Select Open when ready.
Once the communication handshake has completed, the DataCove will respond with a login screen similar to the below image.
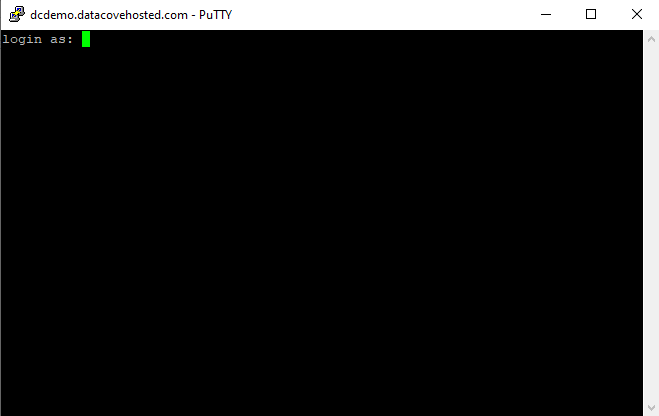
The default login for the console system configuration menu is as follows, but if this password has been changed, be sure to use the new password:
Username: cliadmin
Password: ChangeMe
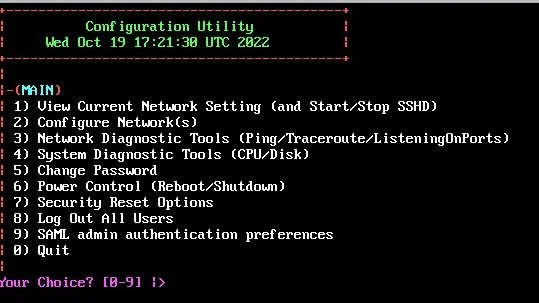
Once authenticated, the system will present its configuration and diagnostic menu, as displayed below.
Reviewing the Current Network Settings
As a prudent policy for networking in general, it is always best to know what the current network settings are before making changes. Reviewing what DataCove has configured in advance of changing those settings is highly recommended.
Begin by entering the number 1 and then press Enter to select Option 1, View Current Network Setting.
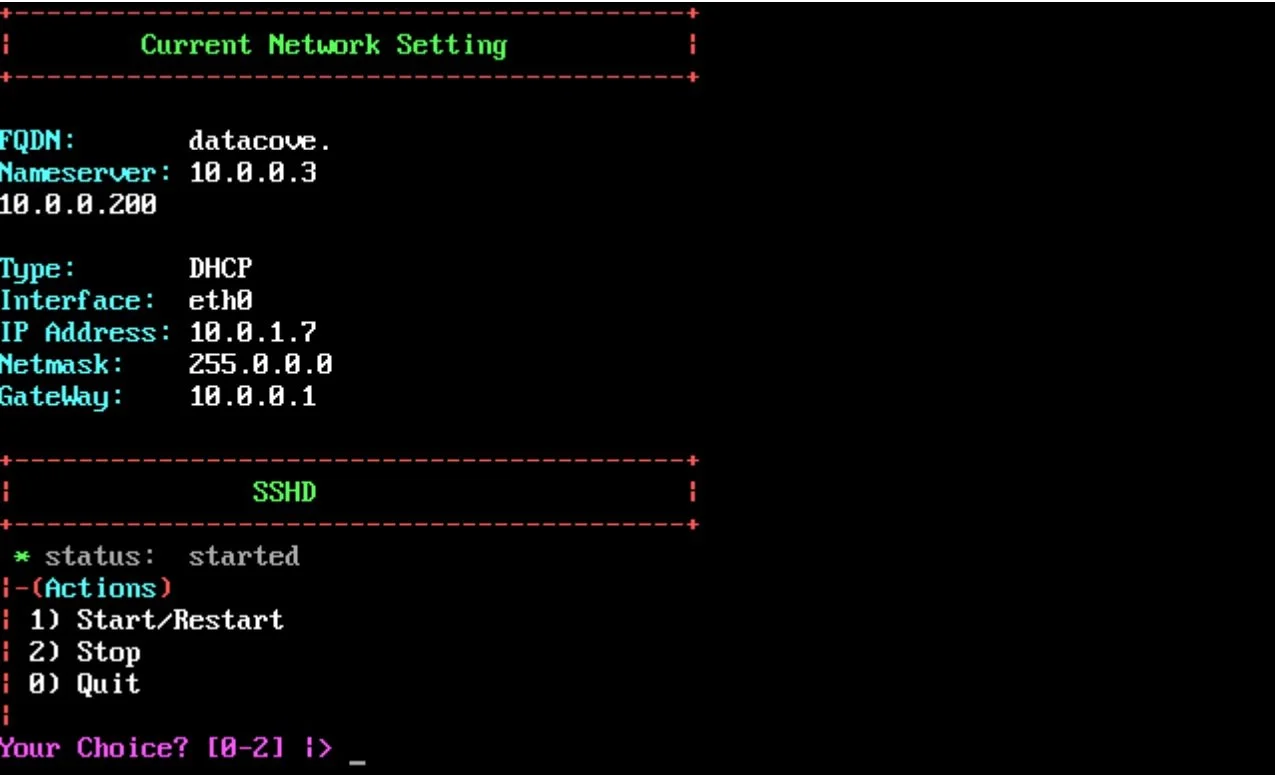
This will display the network configuration of the DataCove. This includes screen displays of all fields that will need to be populated when assigning or updating DataCove’s network configuration.
For quick reference, the following addresses are needed (simple Class A network example below):
• IP address of DataCove: 10.0.1.1
• Subnet mask: 255.0.0.0
• Gateway: 10.0.0.1
• Fully Qualified Domain Name: DataCove.domainname.com
• DNS Servers: 10.0.0.3 10.0.0.200 (add a space between DNS server IP's when adding multiple)
It is best to know the address information for the fields needing updates prior to beginning the static IP setup wizard, as once the static IP address wizard has started, it only waits for a certain period of time per field before automatically moving on.
Once the address information is ready to be added, return to the main menu to begin the static IP setup wizard.
Enter the number 0 and press Enter to return to the main menu.
Updating Static IP Address Information
Now, it is time to begin the static IP setup wizard.
Enter the number 2 and then press Enter to choose Option 2, Configure Networks.
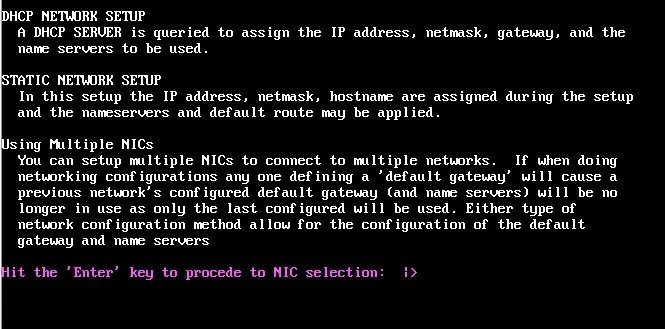
A small definition screen will appear detailing the differences between the DHCP and Static IP setup options, as well as using multiple NICs on the system.
Select Enter after you have finished reading to proceed.
Note: While multiple NICs can be configured on a DataCove, it is not recommended to use them unless very specific use case requirements are needed for multi-homing, dedicated storage networking for backups or other niche situations. Please consult with DataCove Support before attempting to configure this.
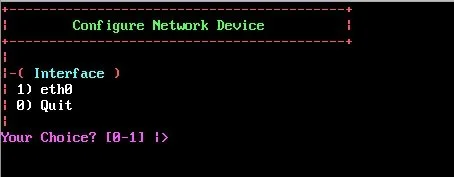
After moving on to NIC selection, select ETH0 as the connection to configure.
Note: If additional ethernet adapters are detected, they will appear here also, but for the purposes of these changes, only choose ETH0.
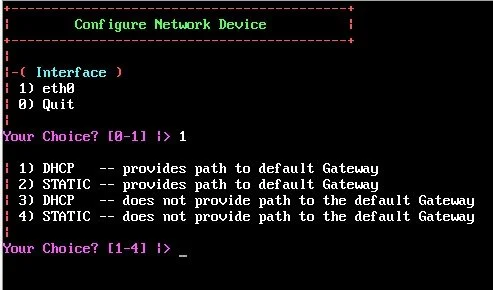
After selecting ETH0, the wizard will then ask how the connection should be configured.
There are four choices here:
DHCP with Path to Gateway will engage a DHCP seek and lease an IP address from the DHCP server, as well as use that for outbound networking to the internet.
Static with Path to Gateway will start the static IP address configuration wizard and will ask for a gateway to be specified for use with outbound networking to the internet.
DHCP without Path to Gateway will engage a DHCP seek and lease an IP address from the DHCP server, but will not use any gateway server specified to it, remaining an “internal” connection within the subnet only.
Static without Path to Gateway will start the static IP address configuration wizard and will ask for all network parameters sans a gateway, remanding the connection to being “internal” within the subnet only.
Unless using a DHCP reservation to make a permanent home for the DataCove, it’s highly recommended to choose Option #2 to bind a static IP address to the system. Select 2 and then hit Enter.
The system will now be at the point where a static IP address and other information can be bound.
Populate each field with the relevant information as it appears, selecting Enter after each field is finished.
IP address will be the permanent network location that the DataCove will reside at and be accessible from.
Subnet mask determines which network segment the system will be on. This should include other servers like the mail server (if applicable) and be accessible to system administrator workstations.
Default gateway operates as the route to the internet that DataCove uses for subscription validation, software updates and to reach external mail services.
Nameservers (or DNS) handle URL and FQDN resolution for the DataCove to translate various network resources into IP addresses.
Fully Qualified Domain Name should be populated with the name of the system that you expect to use as a DNS A Record for users to interact with the system with, specifically for the purposes of HTTPS/SSL connectivity.
Note: For the Nameserver(s) field, use a space to separate multiple DNS entries.

After entering in all of the IP address information, the system will ask to reload network services for the changes to take effect.
Select Y and hit Enter for this to occur.
The system will reload the services and then switch back to the Network Configuration screen.
Select 0 to get back to the main menu.
It is highly recommended to reboot the DataCove once the network changes are complete to fully build out an entirely new routing table that removes all traces of the old networking. This can be performed once back at the main menu by selecting Option 6, then Option R to reboot and then Y and Enter to confirm.
This concludes the DataCove network configuration update guide.