
Behold the ease of use for yourself
Alright, you've read the details of how things work, but you want to see it for yourself.
Call it due diligence, marketing fatigue or outright curiosity; whatever the case, you want to kick the tires on your own.
Sure, we get that. Furthermore, we're not going to lock useful content away behind a gateway that requires you to give us your name and email address, just to pester you about it later. Yes, we know how annoying that is.
So, here you go. Give the DataCove a test drive at your leisure:
Username: admin
Password: DataCove230
It's a lot to take in, right? Want a little guidance? Here's a quick guide to the key items you'll want to look at:
Searching for emails
Let’s talk about Search, the meat and potatoes of any e-Discovery system!
Under the Email Viewing header, you’ll find the Search interface, where the bulk of e-Discovery is performed. The default Search page contains the most common terms used for a quick search preset, such as the date or date range when the email was sent, the sender and recipient, and any keywords you’re looking for that are located in the email body, subject line or text based attachments.
A small “Add Search Term” menu located below this offers additional search terms that can be used to hunt down emails of interest as well.
For a quick test search, select the Email Date Sent Dropdown menu and set it to Before. This will adjust the date to today, and then click the Search button.
See step by step picture included below:

A set of results will then be retrieved, which will fold away the search pane and display the email results pane, along with a slew of options that can be applied to the emails, such as viewing emails, exporting them (to .EML, .PST or .PDF), printing them out, forwarding them to an email address and even tagging them for future review or legal hold.

You’ll also see functions for Saving a search to be run again later (or automating it so it will run and report results to you on a schedule), and the All Tags page, where you can define criteria for legal holds and more, as well as quickly review emails already tagged for hold or follow up investigation.
Activity logging and Auditing
The Status header reveals options for Audit Log review, which tracks all user activity on the system, replete with date stamps, IP address logging and even which individual email was viewed, with a link back to that email. This can be viewed by accessing the Audit Log link on the left hand side of the Status menu. Click on the All Dates search option and then Refresh the page, as in the below example:

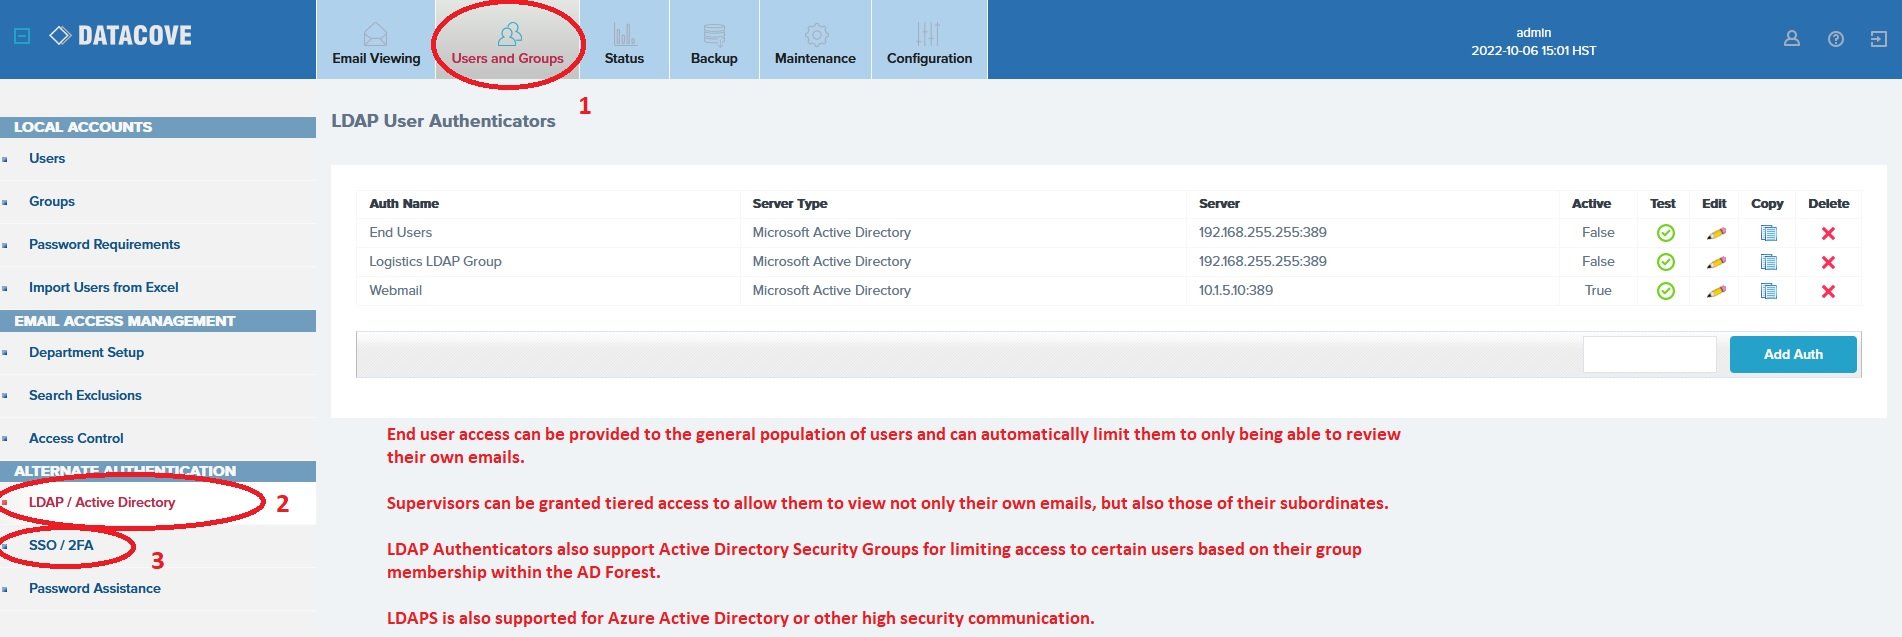
End User Access via LDAP integration and MultiFactor Authentication
The Users And Groups header and its Users page will allow options for creating individual user accounts for enhanced levels of privilege on the machine (traditionally system administrators, but occasionally C-level users, Human Resources and Legal users), but more importantly, for organizations wishing to provide end user access to the archive so they can hunt down their own old emails without bothering IT, behold the LDAP/Active Directory menu on the left hand side.
This page allows the configuration of an “authenticator” which can tie into Active Directory (or other LDAP systems) and pull in user account information from there so those users can log in using their very same domain credentials and not need individual accounts created on the system.
Under the SSO/2FA page, DataCove supports Single Sign On and MultiFactor Authentication with the most popular of Identity Providers out there, like Duo and Okta, as well as many others. Simply create a webserver or generic application to protect in their interfaces, add in DataCove’s ACS, and you’re good to go.
Automated Retention Policies
Lastly, be sure to visit the Maintenance header and Data Retention Policy, which you’ll see has been detailed out with numerous different options for not only a global retention policy for the system, but also various tiers of extended policies for different departments (including LDAP synchronized departments for further automation), individual users by their email address for full legal holds, child/subsidiary organizations and even tagged email containers.
See below image for a bit more information about the different tiers of retention and the flexibility for whatever your needs are:
