Configuring the NFS Server Role on Windows Server 2012R2 or newer
What are Network File System (NFS) network shares and why use them instead of Server Message Block (SMB) network shares?
Network File System, commonly referred to as NFS, is the standard means of creating network file shares in Linux environments. In the same fashion as the common Windows file shares all network and server administrators are familiar with these days, officially known as Common Internet File System (CIFS) or Server Message Block (SMB) network file shares, NFS has played a storied role in the intersystem communication world for almost 40 years. Due to NFS largely only being used commonly in these Linux and occasionally Novell environments, many administrators are unfamiliar with its capabilities and when it can be useful.
Due to this relative rarity, Windows does not automatically install the NFS Server role under its out-of-the-box File System role. To that end, installing the NFS File Server role is required and must be performed on a version of Windows Server; client operating system versions of Windows like Windows 10 and Windows 11 do not support the NFS Server role, they only provide the Client role, which is not sufficient for hosting NFS network shares.
NFS’s access scope is a little different than SMB’s, in that share access is provided at the IP address or Fully Qualified Domain Name (FQDN) level, rather than to a user, meaning that an entire system has access to it.
In terms of file modification permissions, NFS shares possess a similarity with SMB shares with effectively renamed versions of SMB’s usual Read, Change and Full Control permissions being equivalent to NFS’s Read, Write and Root permissions.
NFS has benefits over SMB for DataCove (and other Linux systems) since the protocol is native to DataCove, which runs on Linux. By providing DataCove with an NFS share, DataCove does not need to perform a somewhat overhead-intensive process of using interoperability middleware known as Samba to communicate with SMB shares. By removing this overhead, Remote Backups and Remote Restorations operate faster than over SMB.
While speed is not normally a big concern for the backups, when creating a new backup share for DataCove or especially one that may over a higher latency connection, such as to a remote Warm Site, the speed can mean the difference between a backup that completes on schedule and one that runs into working hours the next day. This is especially useful for organizations attempting to run a Remote Restoration to cover a DataCove from its backup, as reducing any extraneous overheads from using SMB can significantly increase Restoration speed.
Lastly, for some organizations with very strict internal SMB policy inheritance or other security lockdowns, using SMB shares with DataCove may run into complications. In these scenarios, using the far less common NFS protocol can bypass such difficulties with ease. In these high security environments, creating a firewall allowance for both TCP and UDP Port 2049 and TCP and UDP Port 111 is recommended on the server that will host the NFS share.
Configuring the NFS File Server Role on a Windows 2012R2 or newer Server
Preparing a Windows Server for hosting NFS shares is relatively straightforward, requiring the installation of an additional File Server Role that all Windows servers effectively come with anyway.
Note: Some Windows installations may request a reboot to fully install this role, so if this is being installed on file server that is already in use at the time, it would be advisable to conduct this process after business hours or at any other time when the system would not be providing any other services to users.
To begin, log into the server which is planned to host the NFS network share. Logically, this system should possess enough storage capacity to hold the entire quantity of the DataCove’s disk space, plus about 15% more for additional snapshot data and extra copies of certain data that is held for expedient restorations.
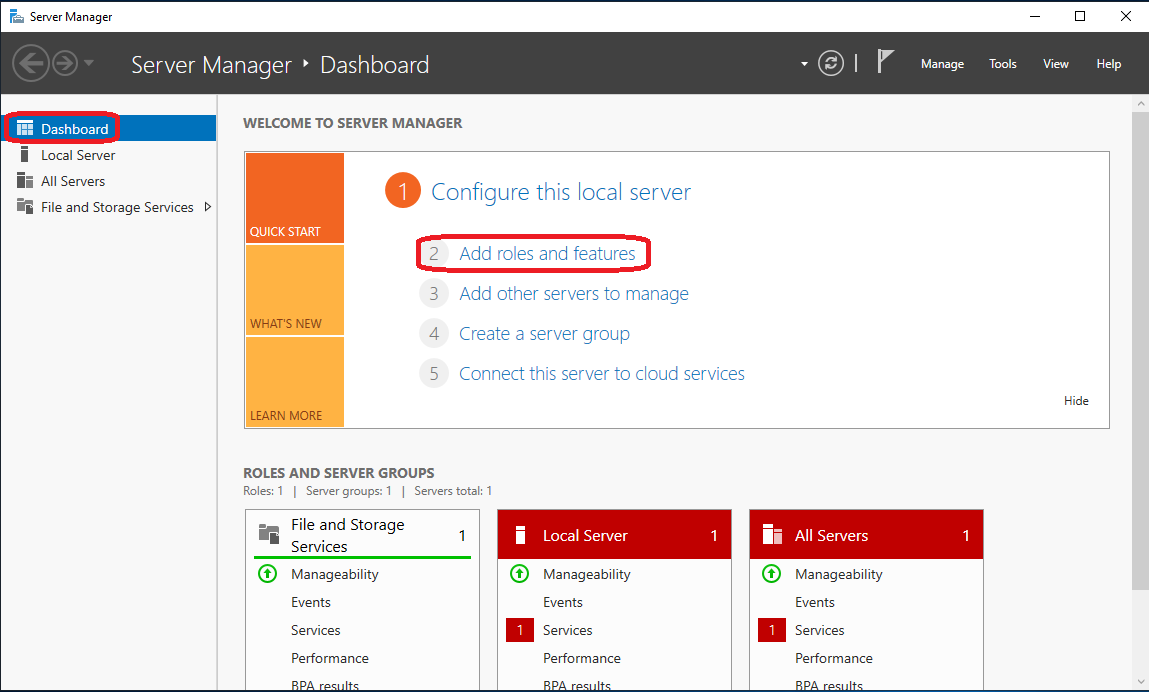
Click the Start button, then select Server Manager from the home tile list.

Server Manager’s Dashboard will now load, and depending on the complexity of the server’s roles already, may take a moment.
After it finishes loading, select Add Roles and Features.
The Add Roles and Features Wizard will now launch, providing some recommendations prior to beginning installation of any new roles or features to the server on the Before You Begin page.
Once these recommendations have been reviewed and acted upon, if necessary, select Next.

On the Installation Type page, select the radio button for Role-based or Feature-based Installation.
Click Next.

For Server Selection, select the server that will be hosting the NFS network share.
Click Next.

The Server Roles page is where the NFS Server Role will be selected.
Locate the File and Storage Services section in the Role tree and expand it.
Underneath will be File and iSCSI Services; expand this subtree also.
Server for NFS will be nested in this section; check the box next to it.

A pop-up window will appear asking for confirmation to install various integrations that are helpful to administrate NFS shares; unless another server has these integrations already available to remotely administrate this server’s network shares, it is highly recommended to add these features.
Select Add Features to confirm and return to the Server Roles page.

With the additional integrations now selected, select Next on the Server Roles page.

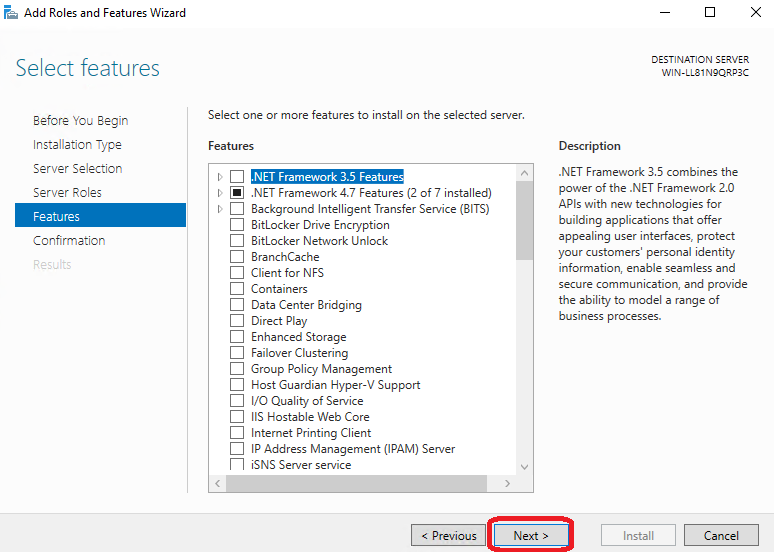
The Select Features page does not require any changes.
Click Next.
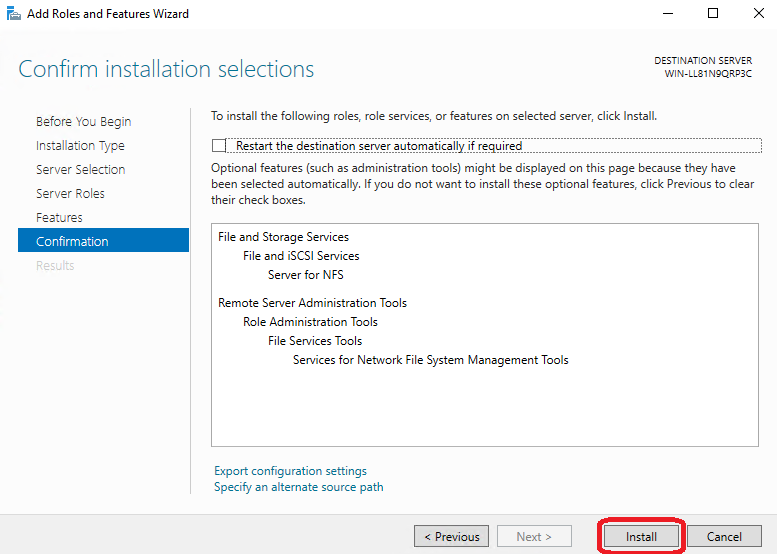
The Confirmation page provides a summary review of the options selected and allows commencement of installation.
As noted above, some servers may require a reboot to fully install this feature. If this server is not in active use by any other users or systems, checking the box to “Restart the destination server automatically” if required is recommended.
If the server is in use, it is safe to install the NFS server role and reboot the system later (if necessary).
Click Install.
The server will now take a few minutes to install this new NFS Server role, after which the screen will change to the Results page.
The Results page will show a progress bar showing how far along the Role’s installation has gone and if it completed successfully.
If the Role installation did not require a reboot, this page can be closed after the Role finishes installation and it is safe to proceed ahead to the next section of Creating a Network Share.

If the server does require a reboot, the Results page will provide a notification specifying that the system must be restarted to conclude the installation.
Reboot the server to continue.
Note: If the “Restart the destination server automatically” option was selected, the system will reboot at this point without further input.

Post-reboot, a dialog box will appear noting the successful installation of the Role.
Click Close and proceed to the next section.
Creating an NFS Network Share
Creation of an NFS network share is very similar to the process of creating an SMB network share, with the exception of the the access permission page being a little buried under multiple submenus.
Begin by navigating to the volume in which the network share will be created. This volume should have sufficient space to mirror the entire DataCove’s capacity plus about 15% more space to accommodate any additional database snapshots, temporary files, etc.
Once in the volume, right click in any empty white space of the screen and select New > Folder from the context menu.

Give the folder a name descriptive of its purpose, such as DataCoveBackup, then right click the folder and select Properties from the context menu.

Locate the NFS Sharing tab at the top of the Properties screen, then select Manage NFS Sharing below.

The NFS Advanced sharing dialog box will be largely greyed out until the Share This Folder checkbox at the top of the dialog box is checked.
Check that box now, then click Permissions towards the bottom of the dialog box.

The NFS Share Permissions dialog box will now spawn.
This box is broken up into two sections: the machines that are configured for access at the top, and the permission access levels in the bottom.
By default, All Machines are allowed Read-Only access to the share. While this is nominally a non-issue due the DataCove backup being encrypted, it is always prudent to layer the security of any datastore and it is highly recommended to adjust this default All Machines access level to No Access via the dropdown menu for Type of Access. Root Access should be disallowed if it is set to allowed at this time also. ANSI Encoding is fine to leave as is.
Once that is set, select the Add… button to add a new system to the access control list.

On the new Add Clients and Client Groups dialog box, a similar layout before will be present: machines to be permitted will be listed on top and permissions to be added will be below.
The difference will be the Add Names box, wherein the IP address or Fully Qualified Domain Name (FQDN) of the DataCove can be added.
Input the IP address or FQDN of the DataCove here, then select Read-Write for Type of Access and check the “Allow Root Access” box.
This network address is the only address to be permitted to access this share; all others will be rejected.
ANSI Encoding is fine to leave as is.
Click OK once these are added in.

Back on the NFS Share Permissions page, verify the settings show the DataCove’s IP address or FQDN with Read-Write privileges, Root Access Allowed and ANSI Encoding, then click OK.

Click OK on the NFS Advanced Sharing box and finally OK on the NFS Sharing page itself.
Once the Properties box has closed, refresh the view of the folder. It should now show a pair of green horizontal arrows overlaid atop the folder.
This new icon indicates that the folder is now an active NFS network share and ready for use.

Configuring DataCove’s Remote Backup to use the NFS Network Share
With the NFS network share now configured, DataCove can be instructed to use it for backups.
Start by logging into the DataCove web interface and selecting Backup in the top header bar, then clicking Remote Host Config on the left hand side menu. The Remote Host Config page specifies where DataCove will back up a copy of its emails, database, indices, configuration files and more to. In the event of a catastrophic loss of the system, a new, empty DataCove can be instructed to restore all of the data contained therein and resume workloads from the point in time of the last backup.
To configure an NFS network share as a backup location, complete the following steps:
Populate a 25-60 character alphanumeric Encryption Key that will be used with the 256 AES encryption that all files routed to the backup will be secured with.
This Key is critically important to reserve in at least two digital locations and one physical location; if this Encryption Key is lost, the backup cannot be restored by another DataCove.
Select Filesystem Type on Host, select the NFS radio button.
Enter the Fully Qualified Domain Name (FQDN) or IP address of the backup server.
With permission to access the share being controlled by IP address, no username or password needs to be entered. The DataCove simply needs to be at the IP address authorized to access the NFS network share from the previous step.
Enter the path of the network share itself, preceded by a forward slash (/).
Click Save and Test.

A successful test of the Remote Backup’s parameters will yield a green text pop-up in the upper left hand corner of the page indicating that the information has been successfully saved.

It is now safe to schedule the backup to run regularly via the Remote Backup Schedule section on the left hand side menu.
Daily is the recommended pace for almost all systems, with an after-hours session being best to minimize loads on the file server.

Backups are now set to run automatically to the new NFS network share going forward.