Complying with a Legal Email Deletion Order
What is a Legal Email Deletion Order and how does DataCove accommodate this need?
On very rare occasions, organizations will be legally compelled to delete an email or several from their systems. Nominally, this applies to their email server and potentially their email server backups, but given that DataCove also maintains a copy of every single email that organization has received, the compulsion to delete can apply to the archives as well.
Legal compulsion can take several forms, ranging from the mundane to the top secret, but are almost always followed by an official dictum from a judicial or law enforcement agency. Common examples include:
An organization wanting to adhere to the request of another organization whom accidentally sent them an email with internal information. These are common occurrences due to human error and while they can usually be ignored without consequence, in some instances, a medical organization may accidentally send Protected Health Information (PHI) about it’s patients out which can cause significant trouble and liability to the recipient organization. These are less common than a simple Personally Identifiable Information (PII) leak, but both kinds happen and many organizations are interested in the potential for reciprocity to compensate for human mistakes.
A court order demanding the destruction of data that should not within an organization’s databases for some reason. These can be used as an escalatory measure for the aforementioned example situation of PHI leak, but may also apply in cases of patent or copyright infringement.
A state or federal law prohibiting the storage of certain types of potentially sensitive, dangerous or illegal data. Child pornography or weapon-making literature tends to wind up here.
A law enforcement agency demand for destruction or surrender of the data for reasons of national security. Data held by defense contractors who are not compliant with the data security requirements can fall into this situation.
While there are many possible reasons why data must be removed from the DataCove, most tend to fall under the aforementioned umbrella categories. If an organization does not, or cannot, comply with such a Legal Order they risk seizure of any devices or systems containing that data, which can be quite catastrophic to an organization’s ability to function depending on which systems are seized. To prevent the DataCove from being a system subject to seizure, DataCove possesses a feature known as Individual Email Deletion to enable organizations who are so compelled to delete just that data while leaving the remaining archives perfectly intact.
Note: Using the Retention Policy feature can technically achieve these goals as well, but not without a massive amount of collateral damage as that is designed for bulk email deletion, not small scale operations. It is rarely worthwhile to even entertain the idea of using the Retention Policy’s DataAging function to remove data due to this.
Due to the obvious dangers of such selective email deletion, this feature is nominally locked and requires a special enablement via the DataCove Support team before it can be used.
Requesting Activation of DataCove’s Individual Email Deletion Feature
Given the potential dangers of the Individual Email Deletion feature in the hands of the unscrupulous, Tangent keeps this feature disabled unless specifically requested for activation with official notice from the organization in question.
This notice requires some specific parameters to be filled out and sent in to Tangent’s DataCove Support team, who will record this information for future reference in case of questions that may arise in the future as to the fate of these emails. Data spoliation is taken very seriously by law enforcement and Tangent can be compelled to review a DataCove and discuss the nature of how emails may have been removed from it, intentionally or otherwise.
When needing to activate this feature, Tangent will require an affidavit to clearly state the purpose of the deletion request, to be placed on organization letterhead and signed by an authorized officer of the organization. An example affidavit will contain the following sections:
Maintenance Key of the DataCove system whereupon emails will be removed.
The reason for activation of the Individual Email Deletion feature, with as many specific details as possible.
Statement of possession of legal authority by the signer to initiate this form of data removal.
Agreement to understanding and acceptance of the statement of non-compliance (included below; should be included on the affidavit)
Signature of an authorized officer of the organization.
Non-Compliance Note: Once an email is deleted from the DataCove Archiver in this fashion, you may no longer be compliant with local, state and federal regulations regarding email retention compliance. The Individual Email Deletion feature will remain active no longer than 7 days AFTER the last email is deleted. Requests after this period will require a new, authorized request to be submitted to DataCove support.
Such an affidavit should be submitted via PDF or scanned image file (.JPG or .PNG formats) to Support@Tangent.com at the time the request for feature activation is being made. Upon review and successful authorization of the request, DataCove Support will perform the internal procedures necessary to activate this function remotely and then notify the client of its availability. The usual timeline for this service’s activation is 2 business days.
Creating an Individual Email Deletion Tag
To begin using the Individual Email Deletion feature, log into the DataCove web interface and select Maintenance in the top header bar, then select Delete Specific Emails on the left hand side. In the pre-activation state, the Delete Specific Emails page provides only text fields indicating the need to contact DataCove Support to activate the feature.
If this is showing on the DataCove, the feature has not been activated yet and the prior step of contacting Tangent should be taken first.

Once the Individual Email Deletion feature has been activated, selecting the Delete Specific Emails page will request information regarding the nature of the reason for enabling the Email Deletion.
Generally, this information is specific to the individual case that is necessitating this deletion, and the details added here will be available for future reference in DataCove’s Audit Log. It is recommended to be as descriptive as possible as to the nature of the instructions for deletion in case of any future inquest into why emails were being removed from DataCove in this fashion.
Category options include:
Legal, for court ordered removals.
Security, for inadvertent data leakage of sensitive information.
Internal Audit, for situations when data that should not be transmitted via email or chat is found on DataCove by internal policy enforcement personnel.
External Audit, for situations when data that should not be transmitted via email or chat is found on DataCove by external organizations.
The name of the person who will be carrying out this email deletion should be listed as the Responsible Party.
Acceptance of non-compliance with good recordkeeping practices and the potential for spoliation of data is required to proceed.
Click Submit once all fields are populated.

After defining what the Email Deletion is about, this page will have an appearance similar to the Tag or Legal Hold pages under the Email Viewing sections. Email deletion uses the same Tag functionality for these deletions, in that a very special Tag must be created in this section to then Tag emails that are to be deleted from the system with. Regular Tags and Legal Holds cannot be used for email deletion.
On the Delete Specific Emails page, populate a name for the Deletion Tag, then click the Add Deletion button. The name of the Deletion Tag is recommended to be a brief wording of why the request exists, such as “court ordered deletion” or “request from Company A to delete emails.”

The page will now shift to a more detailed Tag creation page, wherein further detail can be added.
In addition to the Deletion Tag name, a Description must be populated for it which should include as much information as possible as to why this Deletion Tag is being created, who ordered this procedure and who authorized the deletion. This information can be used for legal defense in the future and should be as detailed as possible. Much of this information will be similar to the previous activation of the service, but if multiple Deletion Tags are being created that hunt for different information, they should each have their own individual, specific information provided here.
The Delay Before Deletion countdown timer must also be set on this page, with options of One Week, One Month and One Quarter. This Delay function allows this much time to locate the emails subject to the deletion before the deletion itself commences. Based on how much data must be removed and how much time this may take, different intervals are available for convenience. Once the Delay timer has been set, it cannot be changed, so be sure to allow the administrator performing this function enough time to find and Tag the emails in question. Deletion of the Tagged emails will occur once the time specified has elapsed and cannot be accelerated.
Lastly, check the box to Accept Responsibility for destruction of data on the system, marking an understanding that the administrator performing this step understands the nature of data spoliation and accepts their role in it, then click the Create Deletion Category button.

The page will now refresh and show the new Deletion Tag as ready for use. With this ready, the search and Tagging of emails to be deleted can be started.
Tagging Emails for Deletion
Once a Deletion Tag is ready, the search and destroy operation can begin. Inside the DataCove web interface, navigate to Email Viewing in the top header bar, then select Search on the left hand side.
Use the search parameters necessary to find the emails of relevance, locate them, check the box next to them to select them, then click on the newly present Trash Can icon for Deletion Tags.
Apply the Deletion Tag to the email(s) necessary, then click OK.

The Deletion Tags will now be applied to the desired emails.
Note: If many emails are selected, this process may take a few seconds.
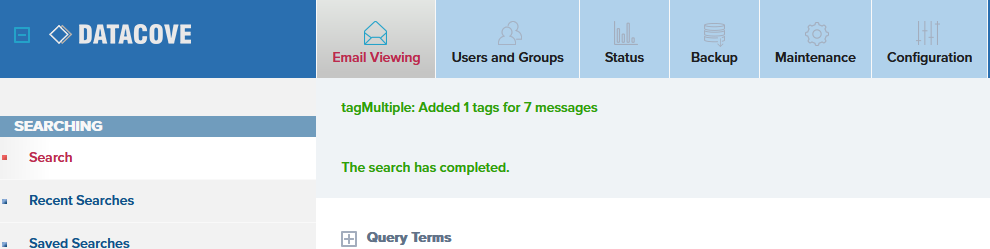
A green success text notification will appear at the top of the screen specifying the Tag being applied.
If additional searches need to be run to find additional emails, run those now and Tag the emails as appropriate.
Once the Tags have been applied, navigating back to Maintenance and Delete Specific Emails will show these Tagged emails being represented in the same fashion as any other Tag, with the Magnifying Glass icon allowing a direct viewing of the Marked Emails to double check they are the ones desired and to remove the Tag from them if some emails had accidental application of the tag.
Once the countdown timer for this Deletion Tag has completed, these emails will be removed from the system.

Tracking and reference of Email Deletion activity can be found in DataCove’s Audit Log, found by clicking on Status in the top header bar, then selecting Audit Log on the left hand side menu.
By using the simple search range of All Dates, All Users and the Delete Specific Emails action type, then clicking Refresh, a list of all Email Deletion activity can be spawned along with the noted reasoning for it. This can be useful in case of future reference needs and is the core reason to add as much detail as possible into the Deletion Tag’s Description fields.
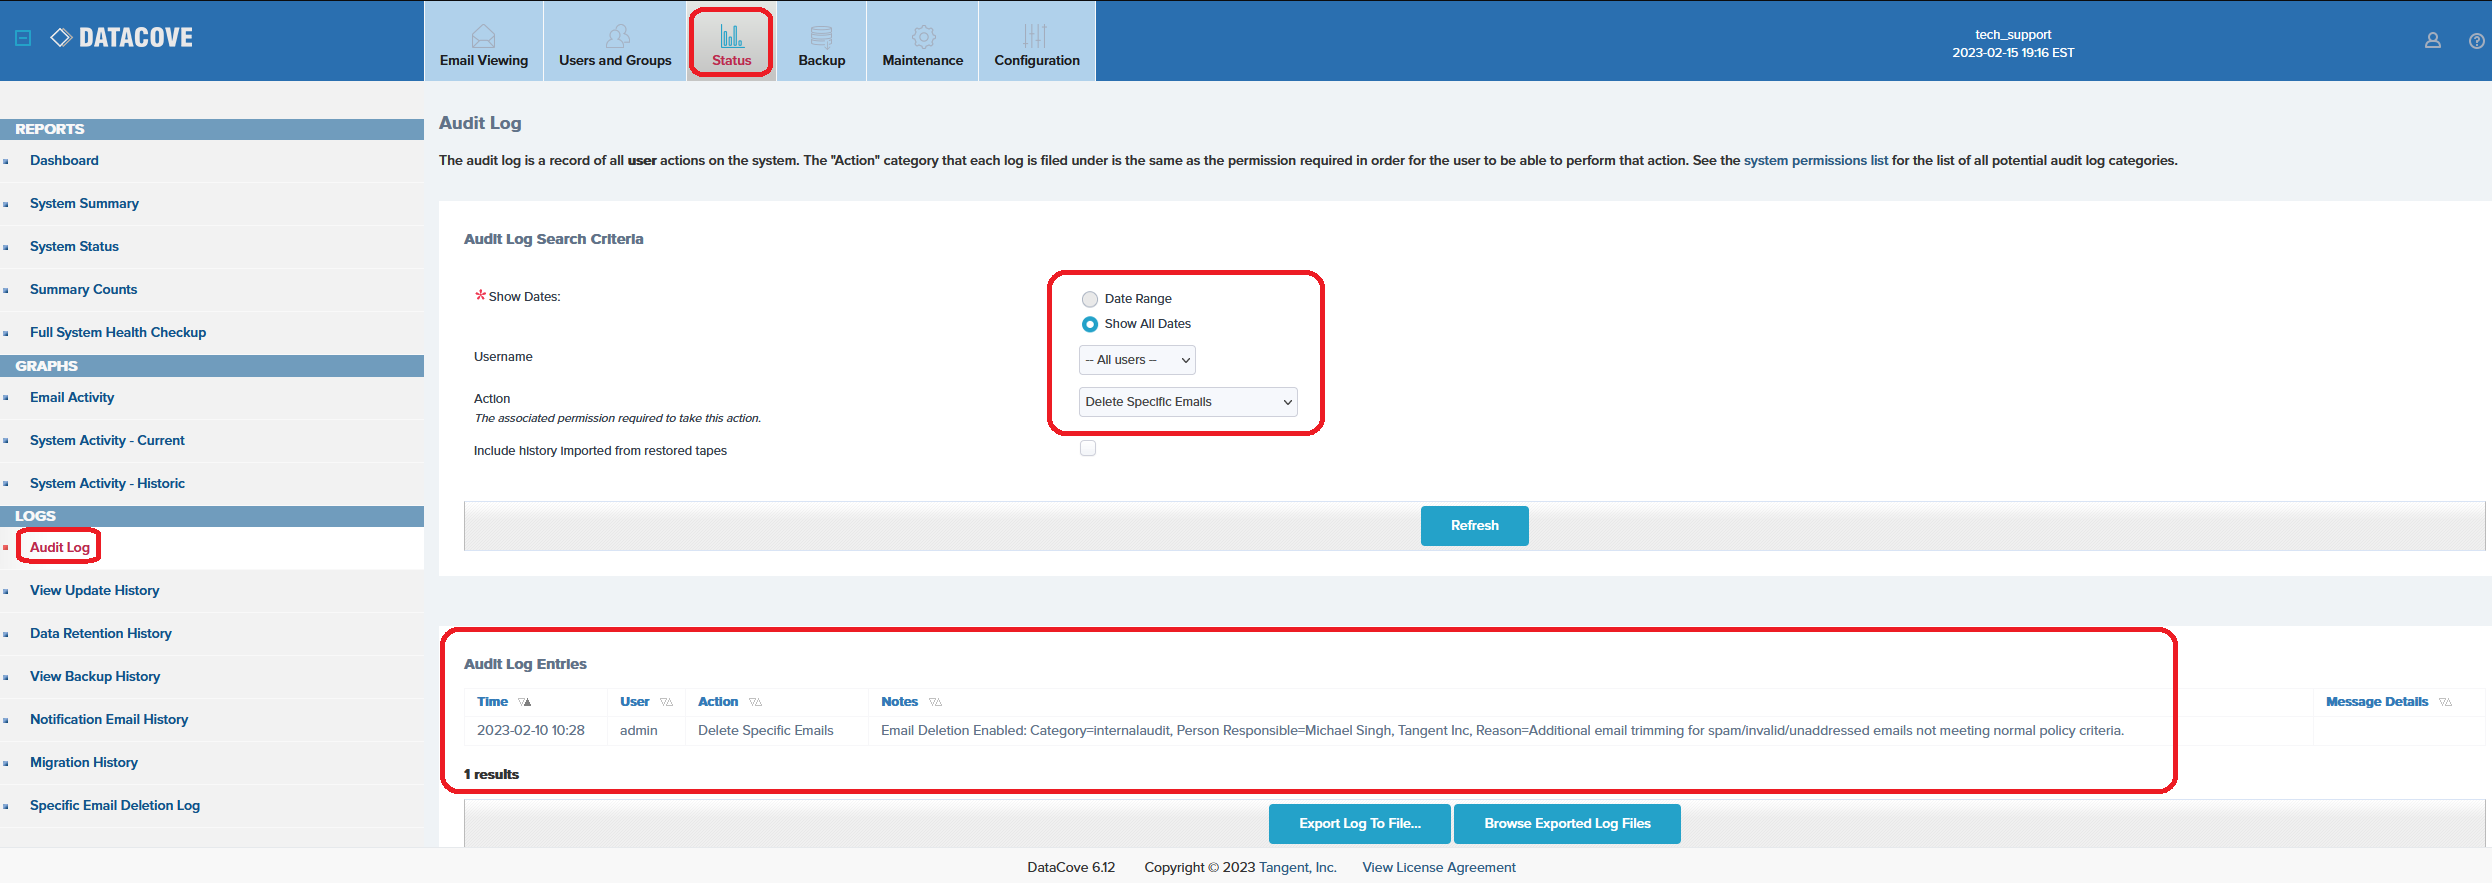
After the emails have been deleted, a new entry will display showing how many emails were purged.

With the emails now having been expunged from the system, the Individual Email Deletion is complete.
The Individual Email Deletion function will automatically disable itself again seven days after the last emails have been purged from the system, returning the system to a state of data security.