Configuring Duo MultiFactor Authentication with DataCove
What is MultiFactor Authentication and how does it help?
From the development of computers and well into many decades of their use in the business and personal use worlds, users have consistently proven their identity to an operating system, application or website via the common Username and Password system. This combination of something that identifies the individual (the Username) and something the individual knows (the Password) have been a pair of keys that, when turned simultaneously, provided access to the system or service.
In our internet-inured world of the present, Usernames have long since adopted the unique identifier of an email address as a constant and are pretty to find or guess given their ubiquity as a communication system; they are no longer a viable “key” in terms of identity-proofing due to how easy they are to determine. Passwords, however, are something only the user knows (or at least are intended that way; we won’t get into Post-It Note passwords, Shared passwords or any of the various travails of the real world) and this “knowledge” of something that is otherwise secret is still useful as a key when accessing a system or service.
This proof-of-knowledge methodology has been reasonably functional for many use cases throughout that time, but the prevalence of new security threats and easier-than-ever means of fooling users into unwittingly giving away that Username and Password combination to malefactors has made it a low barrier of security when used on its own, leading to tens of thousands of compromised accounts every year, both business and personal. The data contained within that account can be used for any number of nefarious purposes, but usually wind up with the goal of extorting money from someone or some organization in the end.
MultiFactor Authentication, commonly abbreviated as 2FA (Two-Factor Authentication) or MFA, is an enhanced means of proving your identity to a system. It combines two or more “factors,” that the user possesses to then authenticate themselves to the system as the intended user. Sticking with the door and key example, it’s essentially adding more keyholes to the door that new keys (the “factors”) can be inserted into for that simultaneous turning to provide access. These new keys are vastly more difficult to steal than a mere Username and Password combination, and provide another strong layer of defense that defends against most common attackers.
These new factors are commonly broken out amongst three different kinds of classification:
The Password is considered “Something you know,” and is the easiest to steal in a variety of technical and non-technical ways.
A Security Token, like a physical keyfob, is “Something you have,” and generally requires some casual physical access to the user to obtain.
Something that is intrinsic to the user, like a retina or fingerprint, is considered “Something you are,” and can be the most challenging to acquire.
By using two or more of these factors, it greatly increases the security of any given service or system by needing additional, much more difficult procure “keys” to obtain access.
DataCove naturally possesses the standard Username and Password functionality that is common throughout the computer world, but with the addition of a third party MFA service provider, henceforth referred to as an Identity Provider (IdP), additional factors can be added for authenticating user login. These IdP’s use a standard of communication known as Security Assertion Markup Language (SAML) in order to transfer access control information bidirectionally, so the term of SAML will be commonly seen in many of the upcoming instructions.
The steps below will cover the integration of your organization’s pre-existing IdP solution with DataCove, affording it a much stronger security barrier in the future.
Note: Using MFA with DataCove requires a valid Certificate-Authority (CA) Signed SSL Certificate to be installed on the system for proper key exchange with the IdP provider. If an SSL Certificate has not yet been uploaded, please follow the steps in the following guide before continuing: https://datacove.net/knowledge-base/uploading-an-ssl-certificate-to-datacove
Obtaining the DataCove SAML MetaData
Your organization’s Identity Provider (IdP) will need two unique URLs from the DataCove in order to prepare to support login requests being generated from it and will use these to authenticate a user back to DataCove as an allowed login, and the DataCove will likewise receive a URL from the IdP to instruct the system on where to send login request prompts.
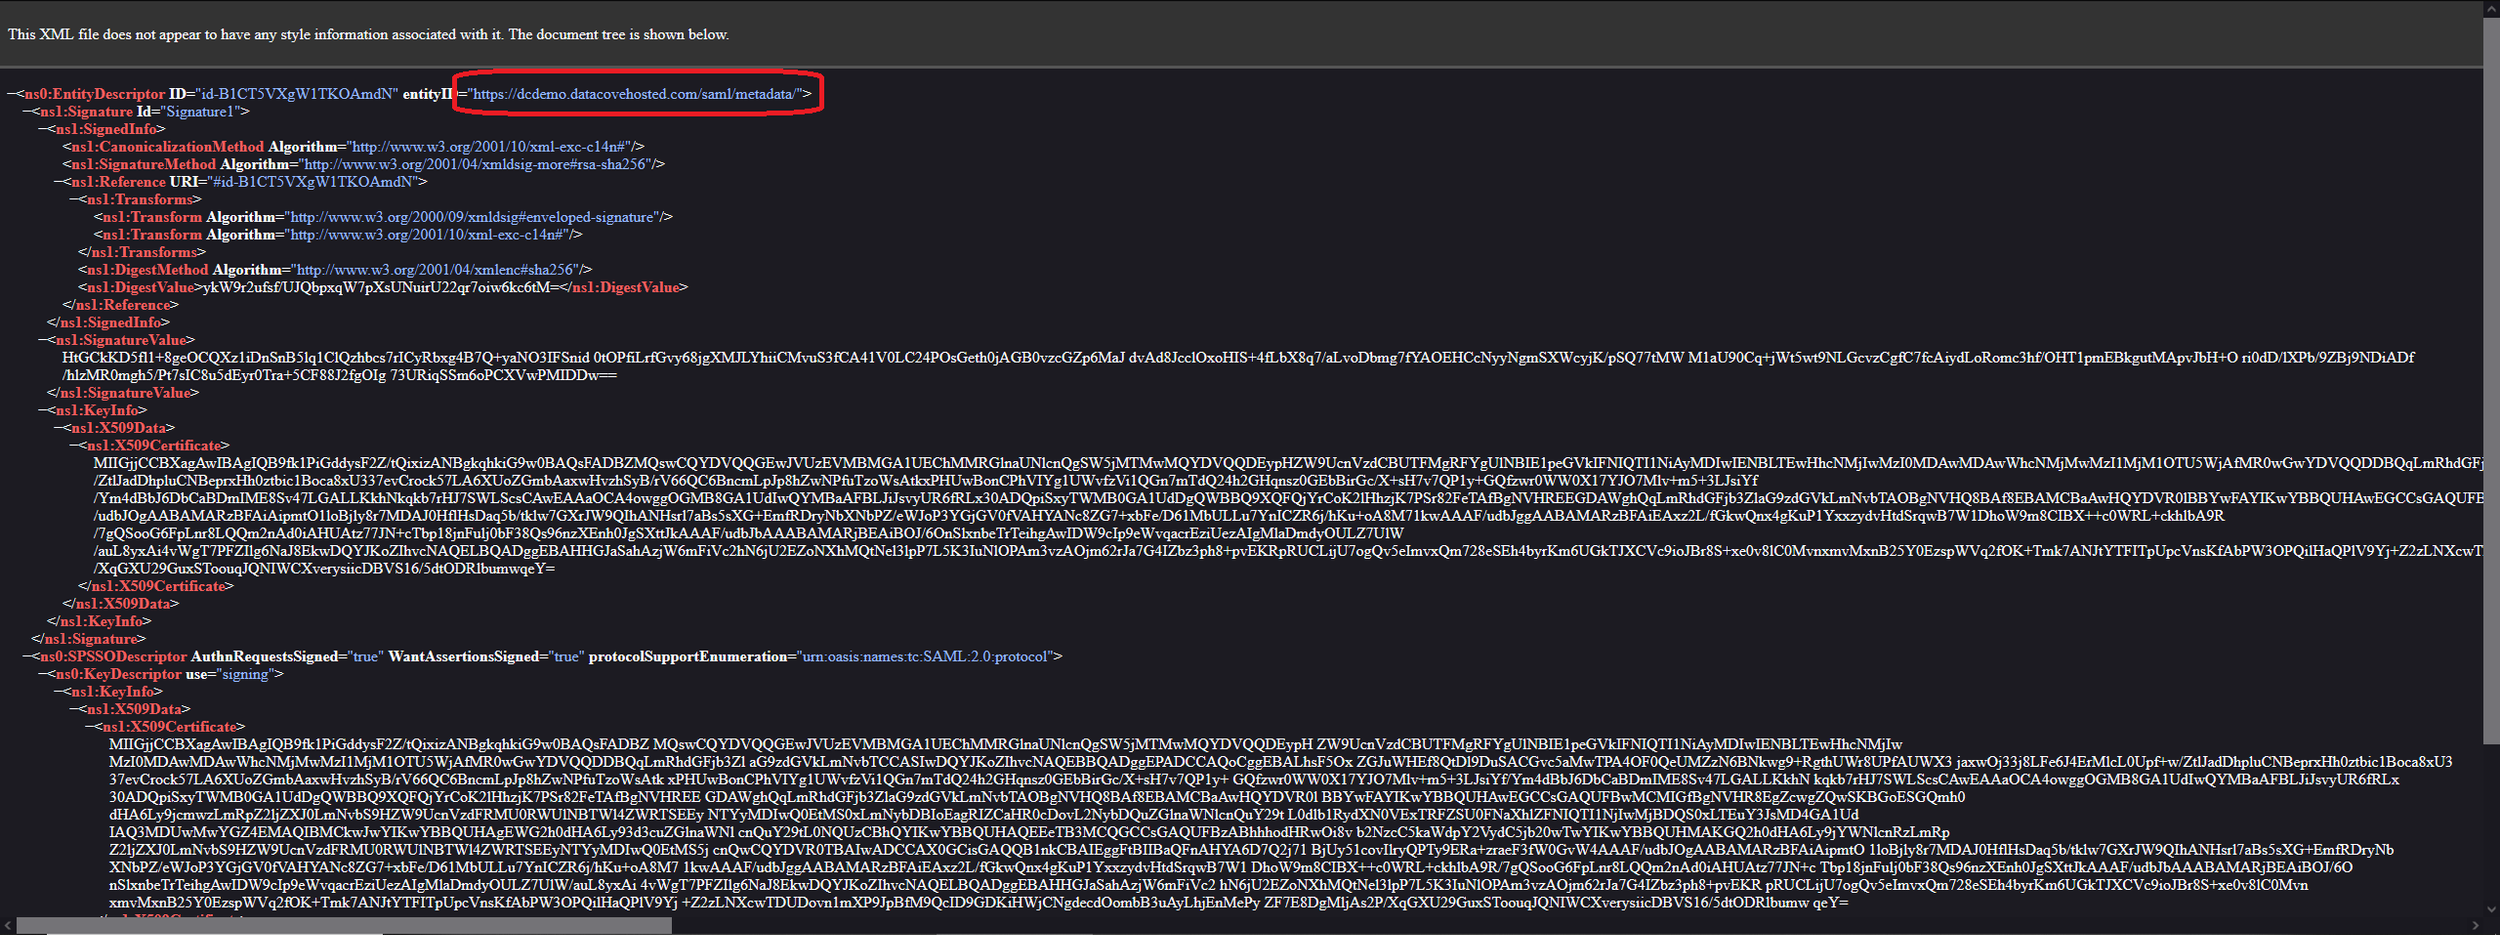
The two DataCove-native URLs are found by logging into the DataCove web interface, selecting Users and Groups in the top header bar, clicking on SSO/2FA on the left hand side and then clicking on the “This Link” text at the top of the screen.

This link will open a new tab providing a large quantity of XML content, which is the SAML MetaData that the IdP will need to communicate with the DataCove. Two specific URLs on this page will be necessary to capture: the MetaData URL and the Assertion Consumer Service (ACS) URL.
These two URLs are universal between any DataCove and will take on the fully qualified domain name of the machine. For example, a DataCove named MASH4077 will always have a URL of https://MASH4077.domainname.com/saml/metadata/, with another DataCove named MASH8055 will always have https://MASH8055.domainname.com/saml/metadata/.
Using the example provided below as a guide, on your Datacove, locate the https://hostname.datacovehosted.com/saml/metadata and https://hostname.datacovehosted.com/saml/acs URLs. Depending on screen size and resolution used, scrolling down may be necessary.
Copy and paste this information over to a holding area like Notepad to add into the IdP’s relevant fields for it in the next section. Once the MetaData information has been captured, close the XML windows and leave the SSO/2FA page of DataCove available for data entry.

Creating a Protected Application in Duo
Duo’s naming convention for integrating their MFA protection to a new system or service is called Protecting an Application. The steps to configure that for DataCove are covered below.
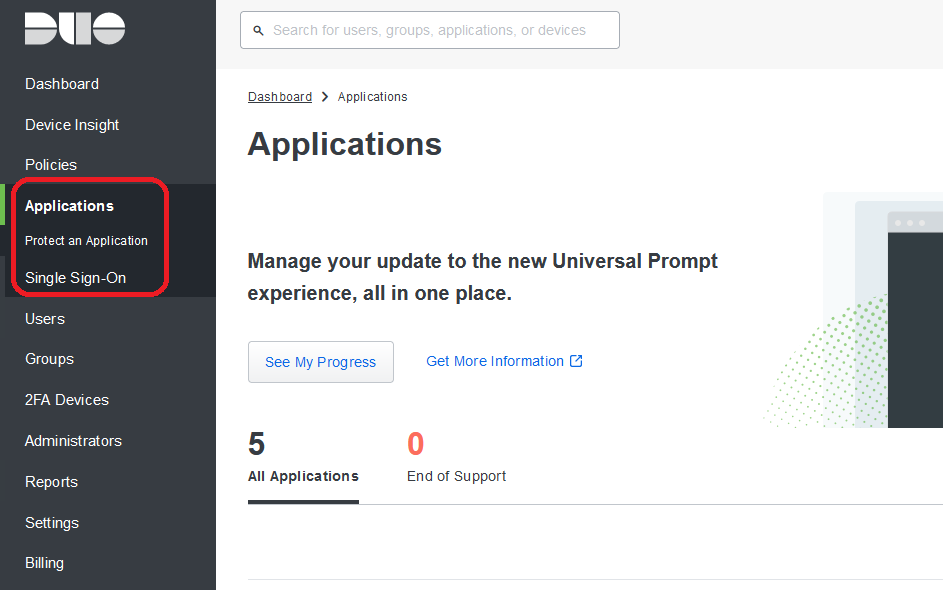
Log into the Duo web interface with an administrative login and navigate to Applications on the left hand side menu, then select Protect an Application.
Duo will present a list of pre-approved applications they already operate with on the following page. As DataCove is not a service needing that kind of deep integration with them, we’ll be using their default SAML Service Provider option.
Search for Generic in the search bar at the top of the screen.
Select Generic SAML Service Provider from the list that appears, then select Protect.

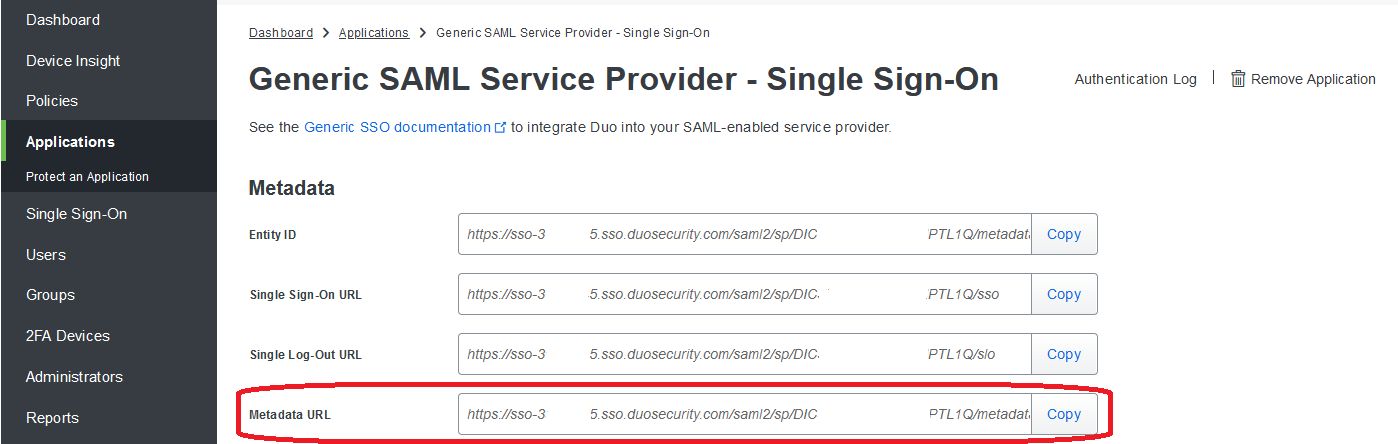
Duo will begin building a new application page for a Generic SAML Service Provider - Single Sign On service. This is the service we’ll be configuring for use with DataCove.
Be sure to copy the MetaData URL on this page for later use on DataCove. Place this copied URL on a Notepad or other location for easy recall in a subsequent section.
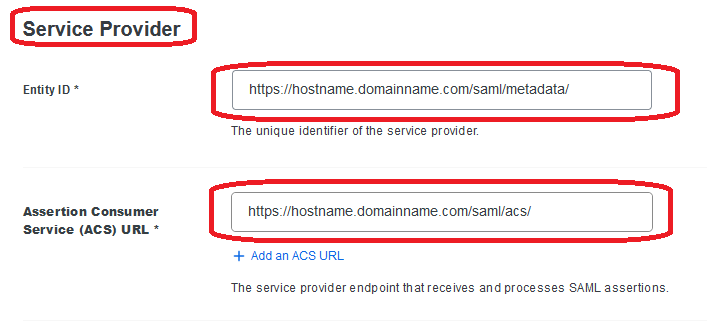
Scroll down the page until finding the Service Provider section.
Populate the Entity ID with the Datacove MetaData URL and the Assertion Consumer Service (ACS) field with the ACS URL from DataCove.
Note: The Entity ID and ACS URL should both match the DataCove’s fully qualified domain name (FQDN) perfectly, including case sensitivity. The SSL certificate, FQDN and MetaData and ACS URLs must all match exactly for Duo to accept the assertions.
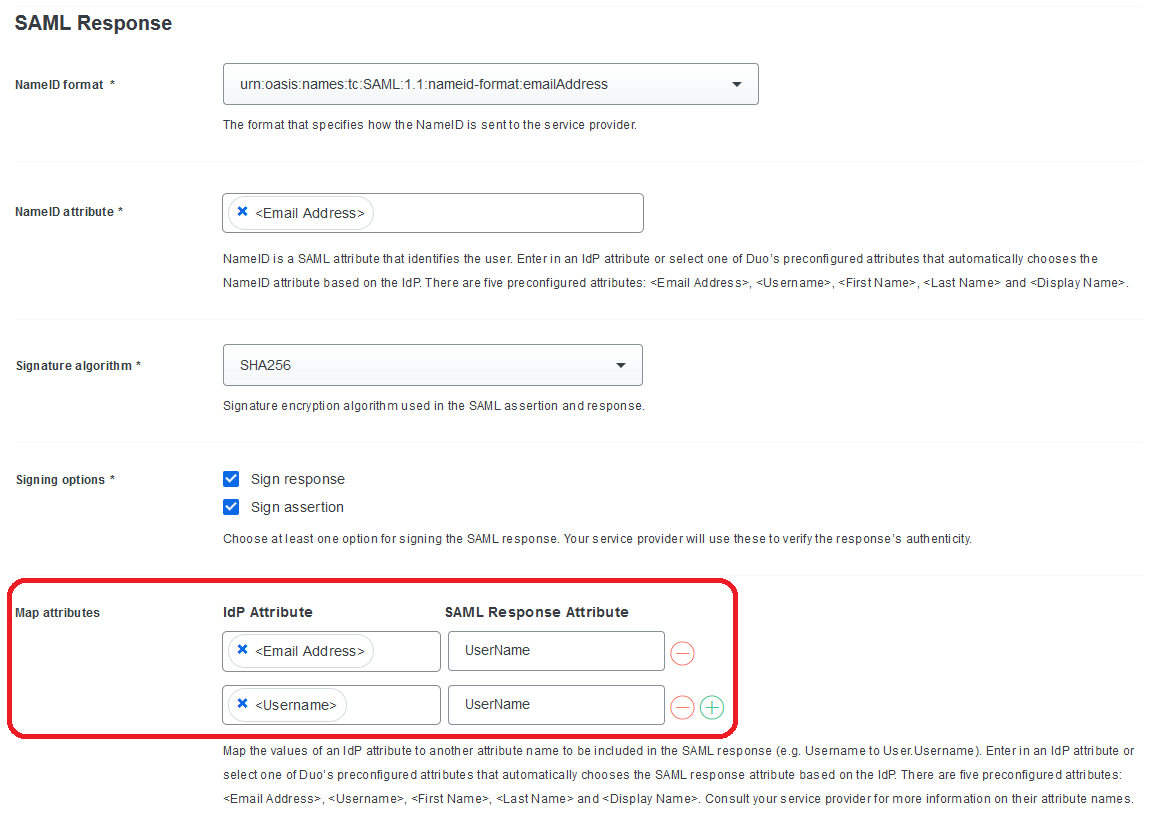
Continue scrolling down the page until finding the SAML Response section.
Under the Map Attributes heading, add the Email Address and Username IdP Attributes and set them to respond with UserName under the SAML Response Attribute field.
This will translate either the local account username or LDAP authenticated accounts’ email address into a Username that DataCove will respond to.
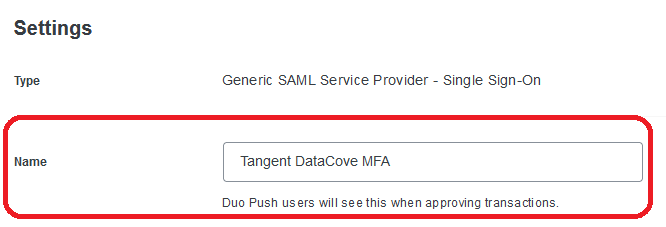
Lastly, scroll down to the Settings section and give the application a name that allows for immediate recognition of its purpose. Generally, naming it DataCove Email Archiver or similar is sufficient for most organizations.
No other settings under this Duo Application configuration page are necessary, but any other preferences that may be desired by the organization can be set now.
Additional information about Duo’s Generic Service Provider setup can be found here: https://duo.com/docs/sso-generic
Adding the Duo MetaData to DataCove and Applying MFA to Specific Users and Groups
If the SSO/2FA page from earlier in this process is still up, switch to that page now.
If it is no longer up, log into the DataCove web interface and navigate to Users and Groups in the top header bar, then select SSO/2FA from the left hand side menu.
DataCove has three options for which user accounts will be affected by the MFA configuration:
All users, which include both local users on the system as well as any LDAP Authenticated users. This is selected by using the Configure Global SAML button.
Local Users only, which are specific to local user accounts made on the DataCove like the ‘admin’ account. This can be configured by selecting Configure SAML for Local Users.
LDAP Authenticated Users, which are users who are granted access via an Active Directory group or common name system. This can be configured by selecting Configure SAML for LDAP Auth.
In general, most organizations will want to use the Configure Global SAML function to provide MFA for all users. In situations where different MFA systems exist, such as independent systems for administrative staff and for the end users, individual authentication options can exist for different user types.
Select the desired User Type to apply MFA to to proceed.
Note: DataCove does support IdP-initiated logins for Single Sign On purposes, but it is not recommended to use this function due to the security risks it presents from communication snooping or other user token theft issues. The use of IdP-initiated logins or their configuration is beyond the scope of this guide due to their often unique cases and configurations. Tangent Support should be contacted for troubleshooting assistance if this feature does not function with your IdP.
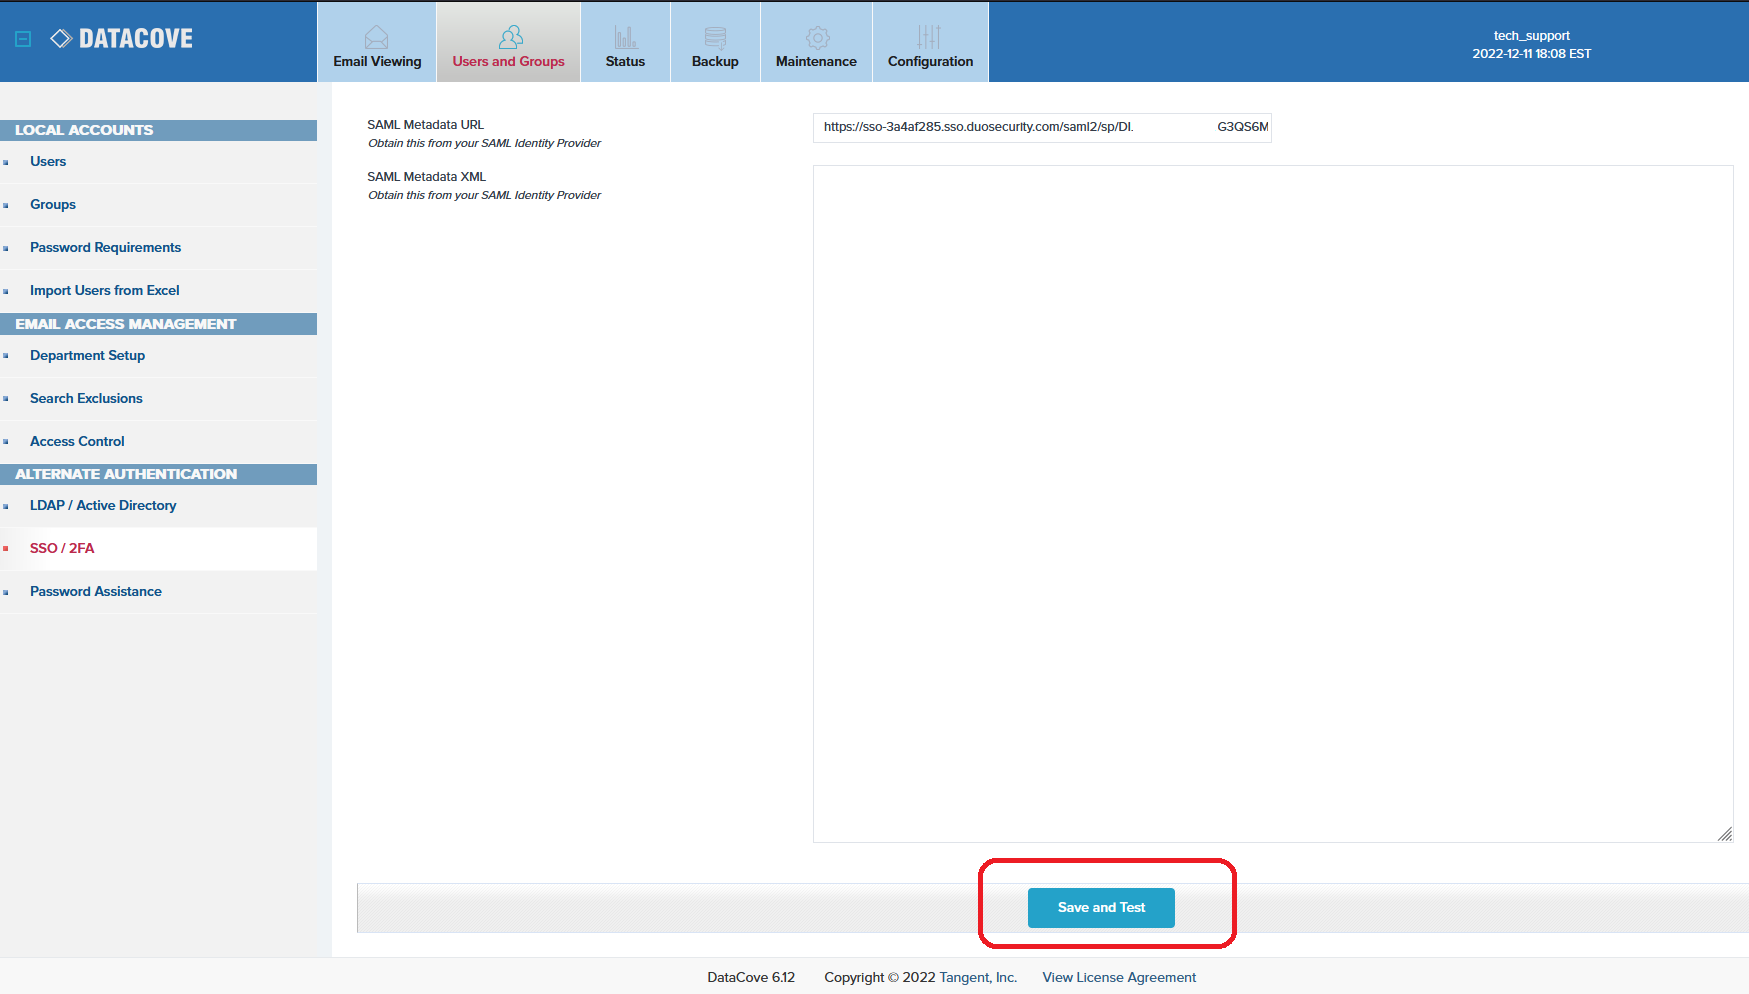
Copy the SAML MetaData URL reserved earlier form the Duo Protect Application page into the field at the top or use the SAML MetaData XML content in the second field. Only one field needs to be populated, and the recommended field to use is the SAML MetaData URL.

Once the URL is copied, scroll down to the bottom of the page and select Save and Test.
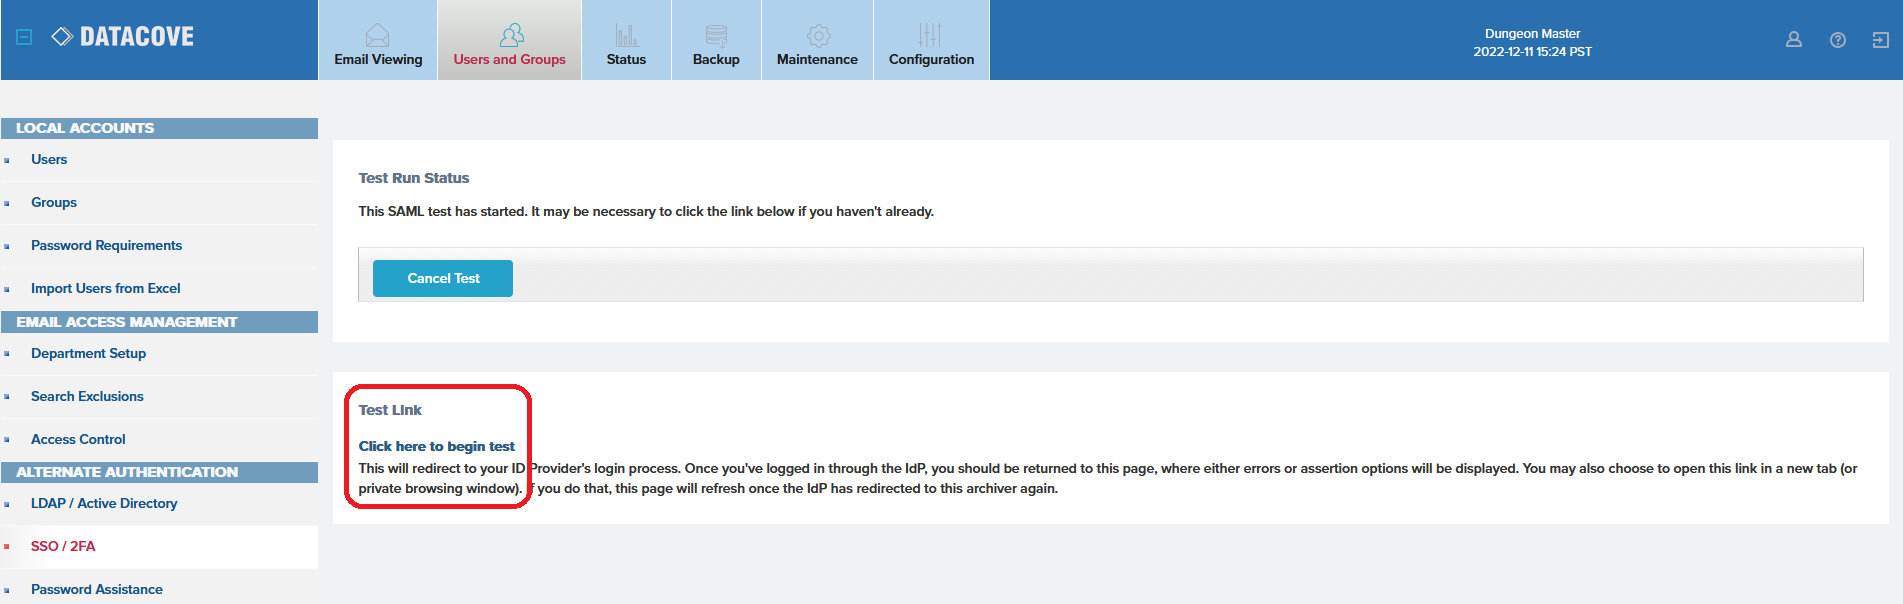
A test battery will now launch behind the scenes, wherein DataCove will attempt to reach out to the IdP to inquire with it for supported User Attributes. Unless there is already a live browser session authenticated with the IdP (usually only present in Single Sign On situations), this will likely time out or fail authentication. If after 30 seconds the top portion of the page does not change to text denoting the option to select the attributes to use, or if Single Sign On is not in use, proceed to the Test Link section.
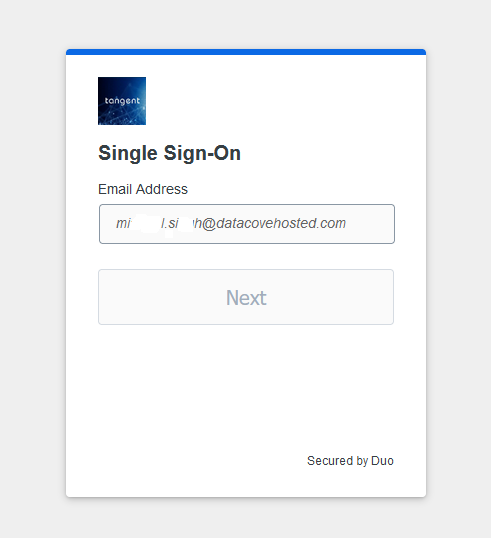
Select the “Click here to begin test” link to open a new tab to your IdP based on the SAML MetaData URL provided in the previous step.
The Duo sign-in page with your organization’s logo will now appear.
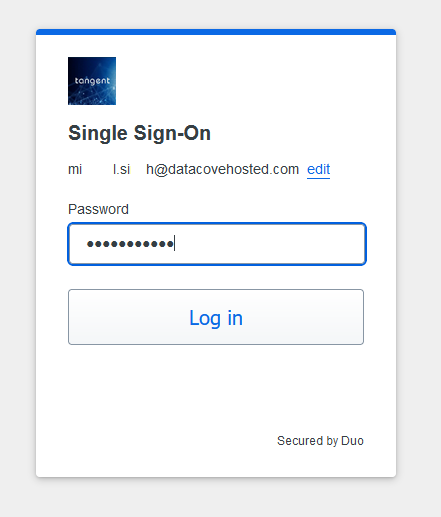
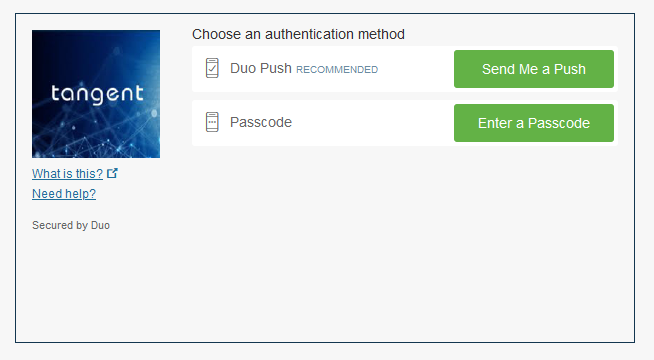
Sign in with an administrative user account and proceed with the preferred MFA authentication option already set up for that account.
Upon successful authentication, the Duo login page will now redirect back to DataCove and provide a list of Attributes that can be used to function as the Username.
Populate the radio button on the UserName attribute and then click Select Username Attribute.
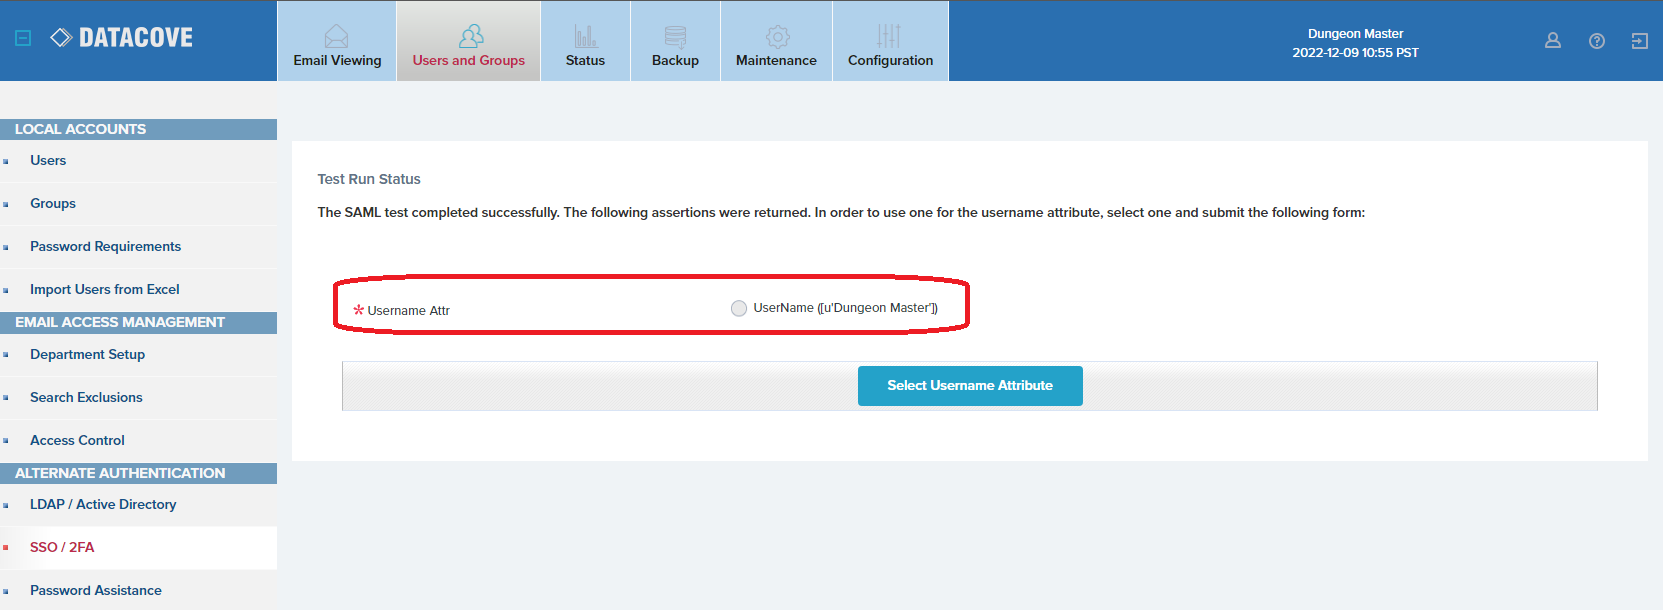
The page will now refresh back to the SSO/2FA section with a small green text update noting which Attribute was selected.
Note: if this Attribute needs to be changed later, run the same Save and Test sequence on the SAML Configurator and select a different Attribute.

The system is now primed for implementation of MFA.
Locate the newly created SAML Authenticator for the appropriate User Type and under the Actions field, select the upward facing green arrow.
This will activate the service for that User Type and all future logins will receive an MFA challenge.
Other User Types can be added in using the same method in the future if changes need to be made.
This concludes the Duo configuration guide for DataCove.